Quick Start
Five minutes from import to your first atlas, merge group and build check. Your original assets are never modified, so you can try everything on a real scene.
1. Open the window (30 seconds)
You need Unity 2022.3 LTS or Unity 6, with the Built-in Render Pipeline, URP or HDRP.
- Import Kit Optimizer and wait for Unity to compile.
- Choose Tools > Kit Optimizer > Kit Optimizer.
- Dock the window next to the Inspector.
The first time, the window opens on the Home tab. It checks your setup and links to the main tasks.
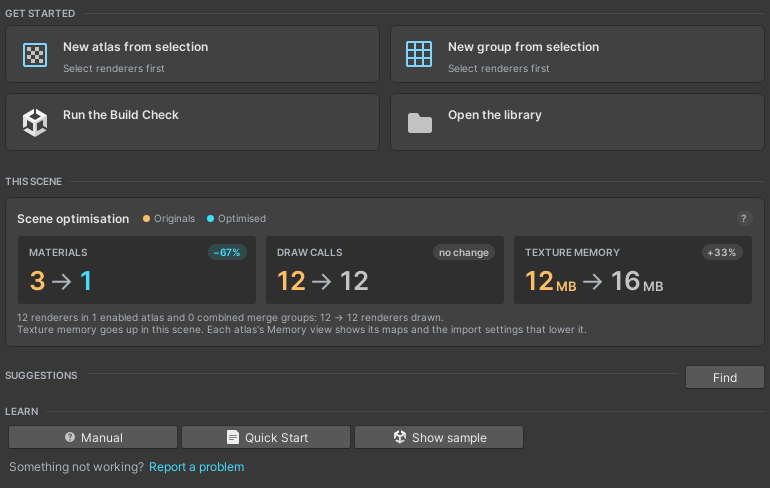
No scene to try it on?
Use the sample scene, the Collector's Study:
- Click Show sample in the Home tab's Learn row (in URP or HDRP, Import sample the first time: it brings in that pipeline's version). The sample's scene is highlighted in the Project window.
- Double-click the scene to open it.
- In the Atlases tab, select Tea Service Atlas and click Generate & Apply.
- In the Merge Groups tab, select Tea Service and click Combine.
- Continue at step 4 below.
The sample's members already belong to Tea Service Atlas and Tea Service. Use those existing entries. Do not create a second atlas or group for those members.
The sample's README.md has its full walkthrough.
Your own props
Steps 2 and 3 below are for your own props that do not already belong to an atlas or merge group.
Tip: Not sure which props to pick? Click Find under Suggestions on the Home tab. It proposes atlases and merge groups for the open scenes, and Create makes one for you.
2. Make your first atlas (2 minutes)
In the Hierarchy, select a few props that use Unity Standard materials (or URP Lit or HDRP Lit materials in those pipelines).
In the Atlases tab, click New atlas from selection.
Click Generate & Apply. The atlas textures, meshes and material are written to
Assets/KitOptimizer/Generated/, and the props now share one material.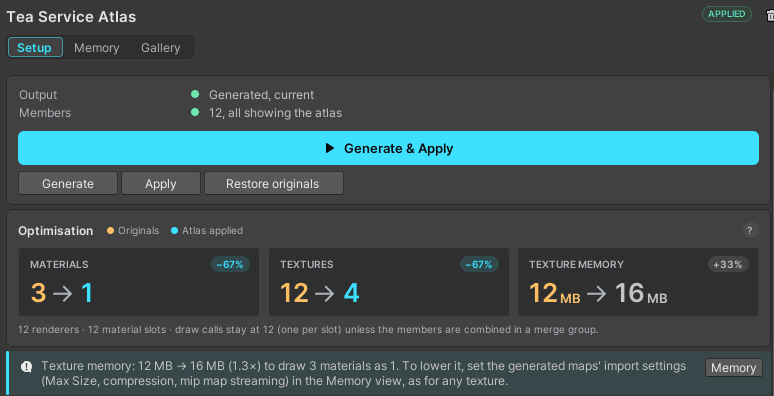
The Setup view after Generate & Apply: the output is current, and the cards compare the originals with the atlas. Open the Gallery view to compare the originals with the result side by side. Drag to orbit, scroll to zoom.
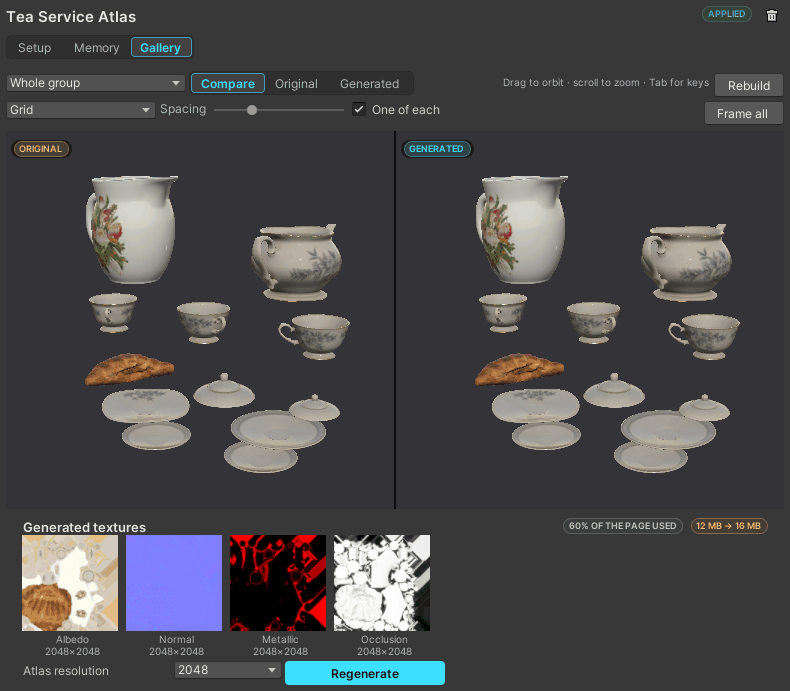
The Gallery view: the originals on the left, the atlas on the right, and the generated textures below. Changed your mind? Click Restore originals, or press Ctrl+Z.
Important: Restoration can be refused because originals or recovery data are missing or ambiguous. Then keep the output and recovery records, and follow the manual's recovery guidance before deleting anything.
If the content does not fit on the page. With the default Detail (Fit to page), it is scaled down to fit, and the Setup view says by how much. With Detail at Full (exact texels), nothing is written. Click Find a page that fits or Propose a split, or lower Detail.
3. Merge some static clutter (1 minute)
- Select a few nearby, static props that now use the same material, for example the ones you just atlased.
- In the Merge Groups tab, click New group from selection.
- Click Combine.
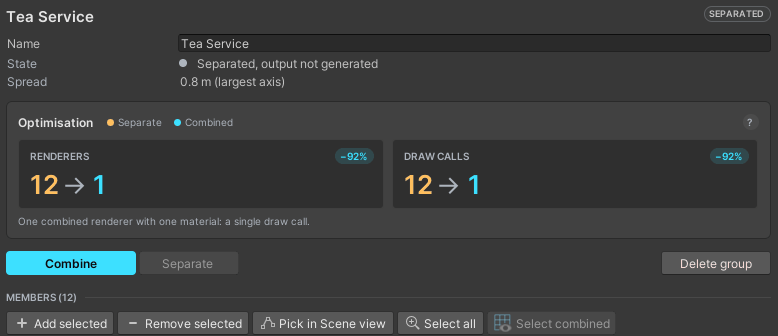
A merge group before Combine: its state, spread and the expected savings.
The props are now drawn as one renderer. The originals stay in the scene, hidden, with their colliders. Click Separate to undo it.
Compatible props with different materials can also combine. The output keeps one submesh per distinct material, so one renderer need not mean one draw call.
Baked lighting is kept.
- Members of one group must share one lightmap. Split by lightmap creates separate groups if they do not.
- When you run a full supported bake again, combined groups are separated and recombined for you.
- The manual explains partial-bake limits.
4. Check before you build (1 minute)
- Open the Build Check tab. It lists anything that differs from what you set up: atlases not generated, out of date or not applied, and merge groups out of date.
- Click Fix all.
- Review anything still reported.
Important: Resolve blockers and any refused operations before building.
5. Reuse props in other projects (30 seconds)
- In the Library tab, click Choose library folder… and pick a folder outside your Unity projects.
- Drag assets onto the tab:
- prefabs from the Project window;
- from your file browser, an Adobe Substance 3D Painter export folder with its model;
- or a PBR model download: the FBX with its textures folder, with maps named like
_diff_1k.
- In any other project with Kit Optimizer, drag the asset from the Library tab into the scene. It arrives with its materials and textures, and with the same GUIDs.
If a placement is interrupted, recovery retries automatically when the editor starts and before the next placement.
Important: If recovery is refused, preserve the whole project's
Library/WorldPropManager/PlacementTransactions/folder, including its.blobbackups. Do not delete Unity'sLibraryfolder while recovery is pending. See Interrupted placement and recovery in the manual.
Next steps
- Tools > Kit Optimizer > Help > Manual (or Manual on the Home tab) explains every tab, shader profiles and output to other shaders, island rules, merging lightmapped objects, prepared library versions, and what to do when something is refused.
- Most buttons and fields explain themselves when you hover over them.